Exercise library

Find Exercises By Muscle Group

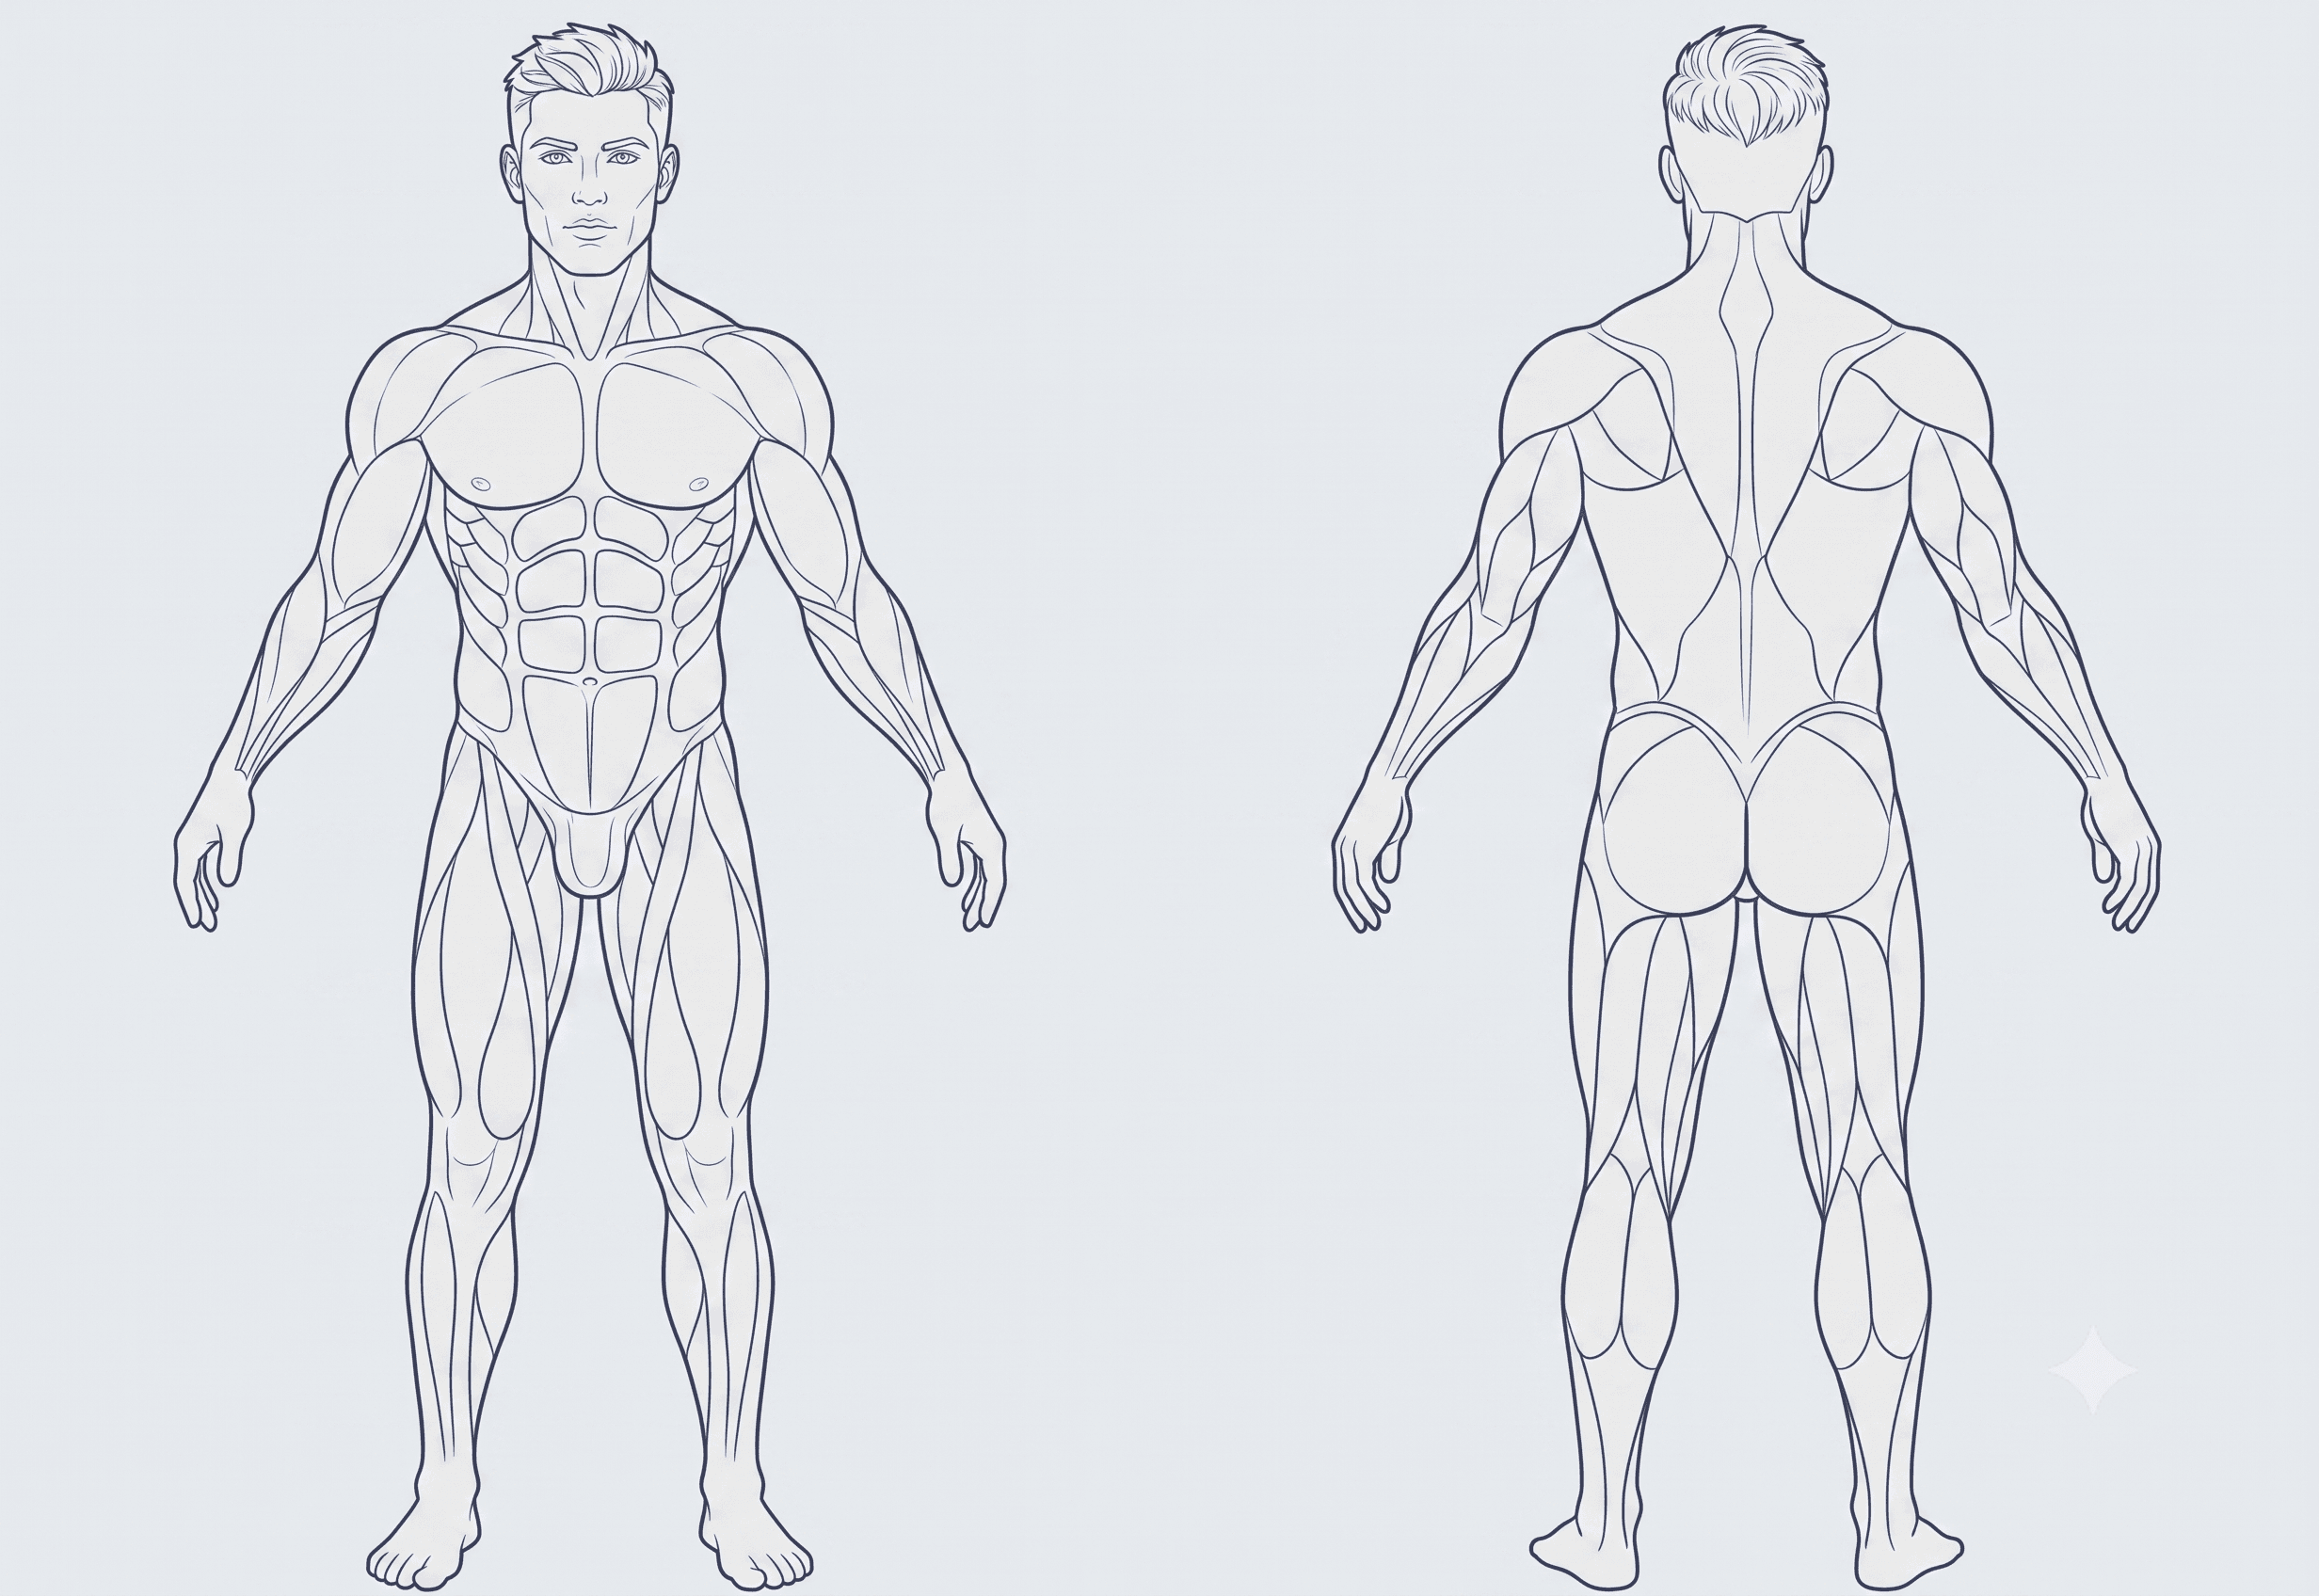
Click a muscle on the front or back body map — or use the filter chips below — to browse exercises with step-by-step instructions and form tips.

Male muscle anatomy diagram, front and back viewChestShouldersBicepsForearmsAbsQuadsCalvesBackTricepsGlutesHamstringsFrontBack

Click a muscle to filter exercises · click again to clear

Steps

  1. Lie on the bench with eyes under the bar, feet flat on the floor.
  2. Grip slightly wider than shoulder-width and unrack the bar over your chest.
  3. Lower the bar to mid-chest with control, elbows at roughly 45 degrees.
  4. Press back up to full lock-out without flaring your elbows.

Tips

  • Keep shoulder blades pulled back and down throughout the set.
  • Use a spotter once you're loading heavier weight.

Steps

  1. Start in a plank with hands just outside shoulder width.
  2. Brace your core and keep a straight line from head to heels.
  3. Lower your chest to the floor, elbows at roughly 45 degrees.
  4. Push through your palms back to the starting position.

Tips

  • Drop to your knees if full push-ups break your form.
  • Don't let your hips sag — squeeze glutes to keep the line straight.

Steps

  1. Sit tall and grip the bar wider than shoulder-width.
  2. Pull the bar down to your upper chest, driving elbows down and back.
  3. Squeeze your shoulder blades together at the bottom.
  4. Control the bar back up to a full stretch overhead.

Tips

  • Avoid leaning back excessively to muscle the weight down.
  • Think 'elbows to hips' rather than just pulling with your hands.

Steps

  1. Hinge at the hips with a soft knee bend, back flat, bar in front of your shins.
  2. Grip the bar just outside your knees.
  3. Row the bar to your lower ribs, keeping elbows close to your body.
  4. Lower with control back to the starting position.

Tips

  • Keep your neck neutral — don't crane your head up to look forward.
  • Brace your core hard to protect your lower back.

Steps

  1. Stand with the bar racked at shoulder height, grip just outside shoulders.
  2. Brace your core and glutes before pressing.
  3. Press the bar straight overhead, moving your head slightly back to clear it.
  4. Lock out overhead with the bar directly above your ears, then lower with control.

Tips

  • Squeeze your glutes to avoid arching your lower back.
  • Exhale forcefully as you finish the press to keep your core braced.

Steps

  1. Stand holding a light dumbbell in each hand at your sides.
  2. With a slight elbow bend, raise both arms out to shoulder height.
  3. Lead with your elbows, not your hands.
  4. Lower slowly back to the starting position.

Tips

  • Use lighter weight than you think — strict form matters more here than load.
  • Avoid shrugging your traps up as you raise the dumbbells.

Steps

  1. Stand tall holding the bar with an underhand, shoulder-width grip.
  2. Keep your elbows pinned to your sides.
  3. Curl the bar up toward your shoulders without swinging your torso.
  4. Lower under control back to a full arm extension.

Tips

  • Avoid using momentum from your hips to move the weight.
  • Squeeze at the top of every rep for a full contraction.

Steps

  1. Hold a dumbbell in each hand with palms facing your torso.
  2. Keep elbows tucked in and curl both weights up together or alternating.
  3. Squeeze at the top without rotating your wrists.
  4. Lower slowly back to the starting position.

Tips

  • This neutral grip is easier on the wrists if barbell curls bother you.
  • Keep your shoulders still — the movement is elbow-only.

Steps

  1. Stand facing a cable stack with a straight or rope attachment overhead.
  2. Keep your elbows pinned to your sides throughout.
  3. Push the attachment down until your arms are fully extended.
  4. Control the weight back up without letting your elbows drift forward.

Tips

  • Lean forward only slightly from the hips — don't use your bodyweight to push.
  • With a rope attachment, spread the ends apart at the bottom for a stronger squeeze.

Steps

  1. Hold one dumbbell with both hands overhead, arms fully extended.
  2. Keep your elbows close to your head and pointed forward.
  3. Lower the dumbbell behind your head until your forearms are near vertical.
  4. Extend back up to the starting position.

Tips

  • Keep your core braced to avoid arching your lower back.
  • Move slowly on the way down — this is where most of the tension happens.

Steps

  1. Sit and rest your forearms on your thighs, palms facing up, wrists just off your knees.
  2. Let the dumbbells roll down to your fingertips.
  3. Curl the weight up by flexing your wrists as high as possible.
  4. Lower slowly back to the stretched position.

Tips

  • Use light weight — forearms fatigue quickly and don't need heavy load.
  • Keep the motion slow and controlled, no swinging.

Steps

  1. Pick up a heavy dumbbell in each hand and stand tall.
  2. Brace your core and set your shoulders back and down.
  3. Walk forward with short, controlled steps for a set distance or time.
  4. Set the weights down with control, keeping your back flat.

Tips

  • Grip as hard as you can — that's most of the point of this exercise.
  • Keep your chest up; don't let the weight pull your shoulders forward.

Steps

  1. Rest on your forearms and toes, elbows under your shoulders.
  2. Form a straight line from head to heels.
  3. Squeeze your glutes and brace your abs as if bracing for a punch.
  4. Hold the position for time without letting your hips sag or pike up.

Tips

  • Breathe steadily — don't hold your breath through the hold.
  • Shorter, strict holds beat longer holds with poor form.

Steps

  1. Kneel below a high cable with a rope attachment, holding it by your head.
  2. Hinge from your torso, curling your ribcage down toward your hips.
  3. Keep your hips still — the movement comes from your spine, not your hips.
  4. Slowly return to the starting position under control.

Tips

  • Round your spine on the way down for a real ab contraction.
  • Keep the weight moderate — strict form beats heavy stacks here.

Steps

  1. Hang from a pull-up bar with a shoulder-width overhand grip.
  2. Brace your core and avoid swinging.
  3. Raise your legs up until they're at least parallel to the floor.
  4. Lower with control back to a dead hang.

Tips

  • Bend your knees to make the movement easier while you build strength.
  • Focus on curling your pelvis under at the top rather than just lifting your legs.

Steps

  1. Set the bar across your upper back, feet roughly shoulder-width apart.
  2. Brace your core and unrack the bar, stepping back to your stance.
  3. Bend your knees and hips together, sitting down and back until thighs are at least parallel.
  4. Drive through your whole foot to stand back up.

Tips

  • Keep your chest up and knees tracking over your toes.
  • Start light and prioritize depth and control before adding weight.

Steps

  1. Sit in the machine with feet shoulder-width on the platform.
  2. Release the safety catches and lower the platform until your knees reach about 90 degrees.
  3. Press through your heels to extend your legs.
  4. Stop just short of locking your knees out fully.

Tips

  • Don't let your lower back round off the seat at the bottom.
  • Keep the movement controlled — don't bounce out of the bottom position.

Steps

  1. Hold the bar in front of your thighs, feet hip-width apart.
  2. With a soft knee bend, hinge at the hips and push them back.
  3. Lower the bar along your legs until you feel a stretch in your hamstrings.
  4. Drive your hips forward to stand back up, squeezing your glutes at the top.

Tips

  • Keep the bar close to your legs the entire rep.
  • Stop lowering once your lower back starts to round.

Steps

  1. Lie face down on the machine with the pad just above your heels.
  2. Grip the handles and keep your hips pressed into the bench.
  3. Curl your heels toward your glutes.
  4. Lower back down under control to a full stretch.

Tips

  • Don't let your hips lift off the pad as you curl.
  • Pause briefly at the top of each rep for a stronger contraction.

Steps

  1. Sit on the floor with your upper back against a bench, bar over your hips.
  2. Plant your feet flat, roughly shoulder-width apart.
  3. Drive through your heels to lift your hips until your torso is parallel to the floor.
  4. Squeeze your glutes hard at the top, then lower with control.

Tips

  • Tuck your chin slightly and keep your ribs down at lockout.
  • Pad the bar — it will dig into your hips without one.

Steps

  1. Lie on your back with knees bent, feet flat, hip-width apart.
  2. Brace your core and drive through your heels to lift your hips.
  3. Squeeze your glutes hard at the top, forming a straight line from knees to shoulders.
  4. Lower back down with control.

Tips

  • Keep your chin tucked to avoid straining your neck.
  • Pause and squeeze for a full second at the top of every rep.

Steps

  1. Stand on the machine platform with the balls of your feet on the edge.
  2. Let your heels drop below the platform for a full stretch.
  3. Press up onto your toes as high as you can.
  4. Lower back down under control to the stretched position.

Tips

  • Pause briefly at the top for a full calf squeeze.
  • Avoid bouncing out of the bottom stretch.

Steps

  1. Sit with the pad resting just above your knees, balls of your feet on the platform.
  2. Let your heels drop for a full stretch.
  3. Press up through the balls of your feet as high as possible.
  4. Lower back down slowly to the stretched position.

Tips

  • This angle targets the soleus more than standing raises — don't skip it.
  • Keep reps slow and controlled rather than rushing through the set.